I’ve been using the Hasegawa Tritool hobby saws for years. They’re very thin, sharp teethed, and slice through plastic very fast and cleanly. However, they are quite delicate in that they’re very thin and I’ve bent my fair share of these blades. They are simple to use, just hold the small blade in your fingers and slice away at the plastic. Nothing against these blades as I’m still using them, but yesterday, I finally cracked open one of the three sets of Tamiya hobby saws I had picked up two years ago. I picked up the sets for about 7 bucks a set on a trip to Hong Kong; but I’ve seen them locally and on various online sources. The project I’m working on now needed a little cutting for some of the parts. Opening the package, I cut one … Read More
Resin SD Glaug Build
Here’s a 2.5 hour long video showing the build progress for a resin SD Glaug kit cut into 5 half hour long segments.
Basic Building Techniques: Cutting, Sanding and Seams
A video showing the most basic of gunpla skills every builder should have; cutting the parts, sanding nubs, and fixing seam lines with styrene glue.
Sticky-Tack Camouflage Masking

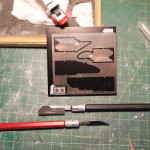
On my recent Rick Dom II I used the rolled sticky-tack masking method. The idea is that the rolled edge of the sticky tack gives you a slightly soft edge on your camouflage that simulates a to-scale overspray patterns from a paint gun. It’s very common among airplane modelers. Since I don’t see this camouflage technique used much in the world of Gunpla, I decided to make a tutorial. Aircraft modelers often use sticky tack to create camouflage patterns on their airplanes. One method is to blow up the instruction manual to match the size of the model and cut out the camouflage pattern. They put sticky-tack on the back of it and stick it to the model. The sticky-tack raises the edge of the paper mask and allows some of the spray to slip under it and create a … Read More
Weathering Techniques
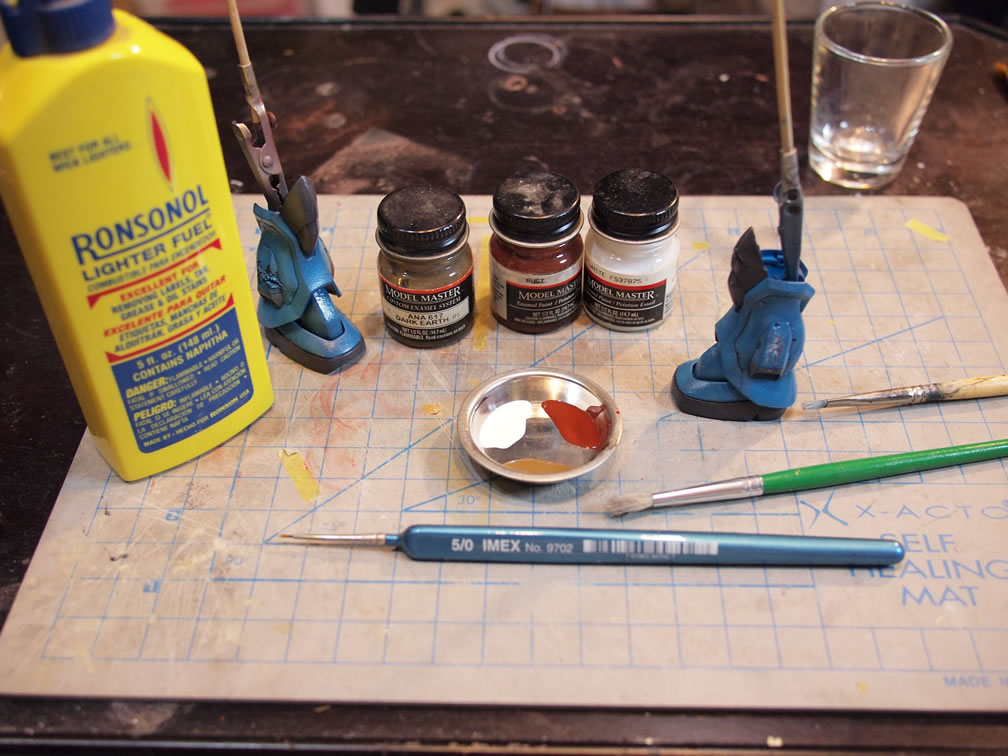
This tutorial will be completed in multiple parts. The idea is that any of these techniques can be stand alone, or can be combined in any number of combinations depending on what effects you want. There isn’t a specific order of operation but a matter of personal preference. For the purposes of this tutorial, I’m starting with the filter/fade technique. Filter/Fade Technique This technique is similar to the wash technique for panel lines. There are rules that MUST be followed for this technique to be successful. The kit’s painted surface must be protected with a clear coat that is a different type of paint from the filter. On the Gouf Custom’s leg in this example, the paint surface has been clear coated with a lacquer based gloss, Mr Super Clear Gloss. The clear coat layer has been cured for a … Read More
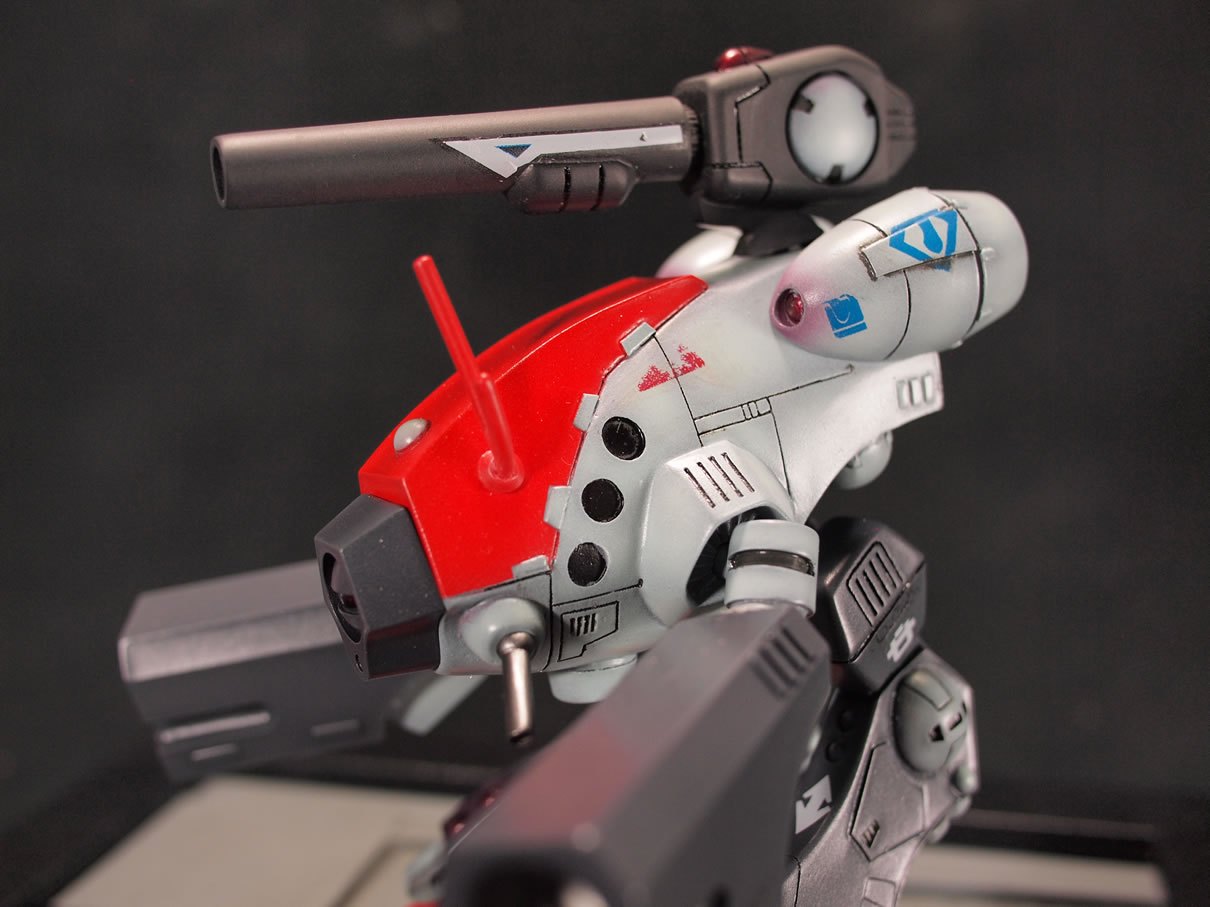
Cosmetic Modifications To Gunpla
There are millions of ways to modify your out of the box gunpla kit. The ever growing aftermarket for add on metal thrusters, LED gimmicks, resin weapon packs, and various other detail up parts help make it very easy to separate your kit from the box stock version. For the article, I will discuss and show a few techniques on adding small modifications to your kits. A very simple mod is the replacement of existing parts on the kit. For this example, I’m replacing the waist cables for the HGUC Sazabi. I found that the cables were rather boring and lacking in detail. So the cables were thrown away completely and a new one was built from scratch. The new cable is assembled from plastic wrapped wiring, adlers nest armor collars, a spring created from wrapping 28 gauge magnet wire … Read More
Working with Water Slide Decals

This is a tutorial for applying water slide decals. I prefer these decals over the dry transfer decals for ease of application. There are a couple of important steps that need to be applied to the parts before applying the decals. The most important step is to apply a gloss clear coat and allowing this to cure prior to applying decals. A gloss clear coat creates a very slick and smooth surface on the parts and this is the perfect environment for the decals to stick. If the surface has not been properly prepared, the decals will not stick very well onto the surface. As a side note, the decals I use are from SamuelDecal.com. In come cases, the decals can be a bit on the delicate side. Meaning the ink for the decals rub off VERY easily. To counter … Read More
Texturizing with styrene glue

The idea is to create a cast iron effect or a rough surface to the plastic. The process uses a solvent glue (I am using Mr Cement Deluxe) other thin solvent glues for model building can also be used; and an old toothbrush. Beginning with a cleaned part (seam lines, mold lines, and spruce nubs have been sanded down). Apply glue to the surface of the parts, the use the brush to rough up the surface of the part. As the glue works against the plastic, melting it; the toothbrush works to get the surface very rough. The plastic parts will be very rough and have some plastic burrs from the brushing process. The second part to the technique needs to let the glue completely dry and cure before progressing. I usually leave the parts to dry over night to … Read More
Silicone Molding and Resin Casting

This is a little tutorial for resin casting. There are two parts for resin casting: making the mold and making the casts. The first step is to make the molds. I like to use legos to make the mold containers because they’re plastic and I can basically build a box of any shape and size. The master piece is measured and a box is built around the master. The master is then placed inside the box. The material I’m using is RTV silicone rubber and comes in two parts, the silicone base and the activator. The base and activator is to be mixed by weight, at a ratio of 10 parts base to 1 part activator. Your standard digital kitchen scale is very handy here when measuring. Using some disposable cups, the RTV is mixed. Once thoroughly mixed, the silicone … Read More
- Page 1 of 2
- 1
- 2