We Shot a Gunpla Commercial So we shot a commercial for the upcoming Southern California Gundam Model Competition. This written and filmed in one day without any planning. Outtakes after the video. Enjoy. [youtube https://www.youtube.com/watch?v=8gdGRYWKmPY?rel=0&controls=0&showinfo=0] [youtube https://www.youtube.com/watch?v=NWDKQp2_D5g?rel=0&controls=0&showinfo=0] Source: Freddy Was Wrong
HG Grimgerde WIP
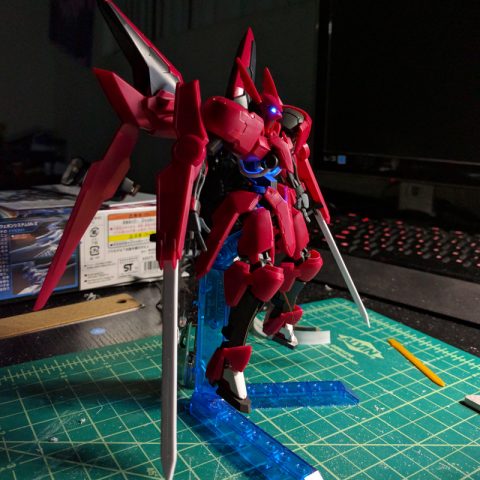
HG Grimgerde WIP So I’m currently at the boring, clean up part of the Space Jahannam build. Decided to switch to a different project I’ve had on my mind for a while. It was originally just to supposed to be a simple, quick build but then thought it would be a good project to test working with surface mount leds (the very tiny ones). The Swords The swords looked a bit too small and I wanted them to look more menacing. Used 1.5mm styrene and traced the original sword on it. Sketched out the size of the swords i wanted and cut them out. I found using a Tamiya panel line scriber instead of of a hobby knife made cutting the thick plastic easier. The Torso The Head: Drilled out the camera area of the head and … Read More
Space Jahannam WIP 2: More mods and details
Space Jahannam WIP 2: More mods and details Weapon Mods I did not like the beam rifle the kit comes with. It just looks to weird in hand without a trigger finger hand and it does not sit on arm too well. Ended up chopping the back end of the rifle and reshaping the handle with styrene and putty. The wrists looked too skinny to me compared with the rest of the arm so I added a wrist gun and grappling cable to them. Started off the wrist gun by cutting a piece of runner that tapers to make the wrist area flat. I initially tried drilling into another piece of runner to make the gun barrels but couldn’t get the hole centered so i ended up buying styrene tubing. Used a piece of sticky tack to … Read More
Completed Build 1 + Tear Apart: HG Purple Frame Unicorn
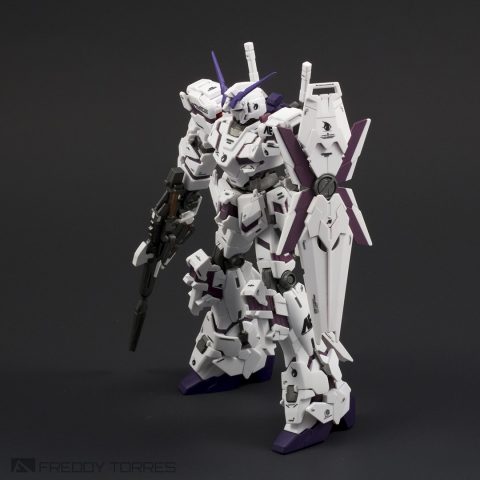
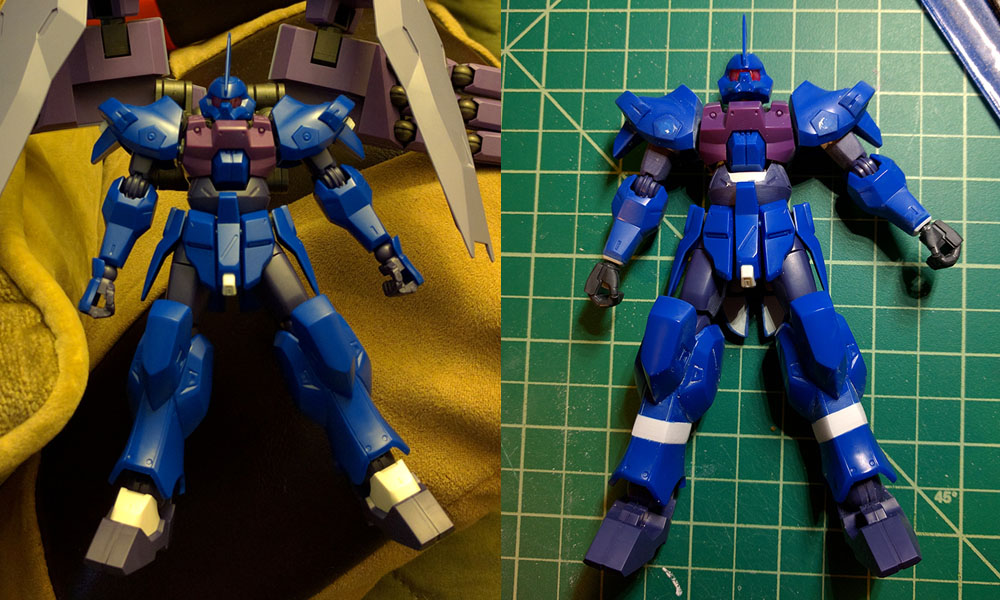
Completed Build 1 + Tear Apart: HG Purple Frame Unicorn Base Kit: HG Unicorn Destroy Mode Mods: None, just paint First kit I attempted anything with other than snap fitting. Everything was hand painted except the white armor parts. Tear Apart Now for the fun part. Ripping it to shreds. I’m still relatively new to the hobby and only recently started painting and modding kits. As with a lot of other things, it’s good practice to look back at your old work and criticize it. This let’s you figure out what you could’ve done better and how to prevent mistakes in the future. So here goes… Paint First up, the paint. Definitely should have painting the white armor pieces. It looks decent with the decals and top coat but it could’ve looked so much better. Always use … Read More
Mistake Roundup #1
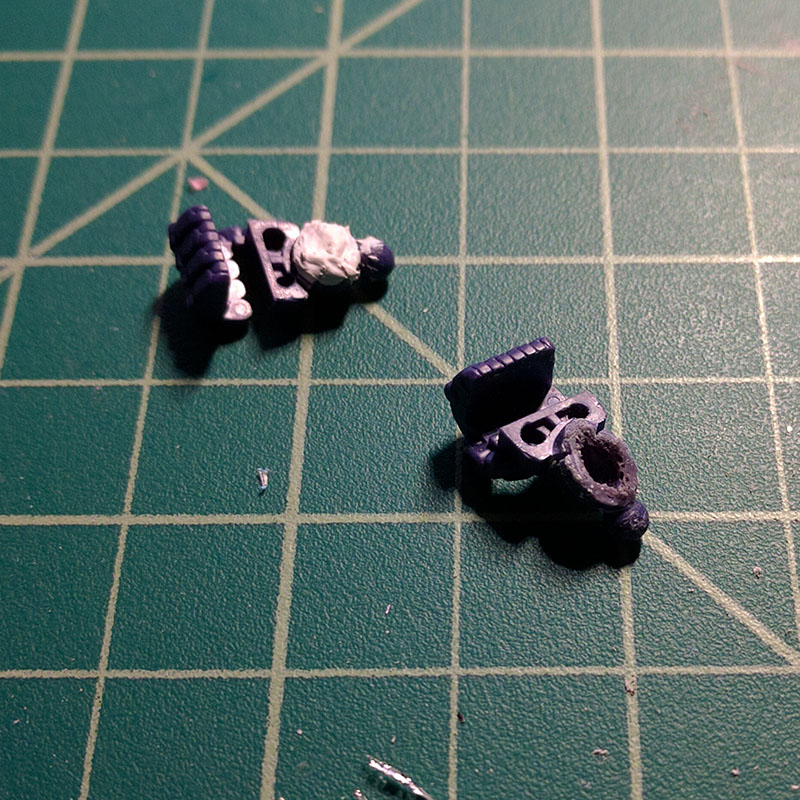
Mistake Roundup #1 I’m pretty new to customizing kits so I still make a lot of mistakes. Here are a few that I have made so you can learn from them. Soft Plastic + Putty + a Ziplock bag = a Rubbery Mess This happened while I was trying to fill in the holes on the backs of the Space Jahannam hands. They are made of the soft plastic that Bandai uses in newer HGs, usually the frame/weapon grey pieces. Normally, using putty to fill in holes usually works great. Don’t do what I did and toss the parts in a Ziplock bag for a few days. The putty never fully cured and turned the plastic into a rubbery/taffy mess that I was easily able to pull apart. I wasn’t able to salvage the parts because the never hardened … Read More
Space Jahannam WIP 1: Proportion Changes and LED Mod
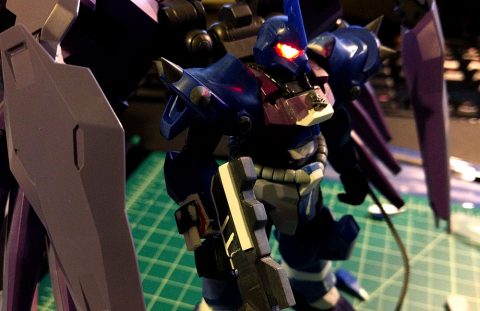
Space Jahannam WIP 1: Proportion Changes and LED Mod I originally got this kit dirt cheap and had it boxed up somewhere after I snapped it together. Decided that it was finally time I did something to it. LED Mod Emptied out the chest cavity as much as I could. Also added some styrene to the hole for the neck polycap to give it a slightly longer neck. Wired up the red LED with 24 gauge magnet copper wire, added a resistor and soldered magnets to the end of the wires for the battery. Used a CR927 battery (the smallest 3v battery i could find) and fiddled with the wires until everything fit into the chest. Chest/Waist Mod I’m going to use the HG Gaeon’s backpack on this kit but the 2 joint chest was way too floppy … Read More
Completed Build 3: Powered GM ‘Murica

Completed Build 3: Powered GM ‘Murica Base Kit: HG Powered GM Cardigan Mods: Leg extensions, panel line scribing, weapon/shield modifications and a paintjob full of freedom Awards: 2nd place, 1/144 Alternate Universe category at SCGMC 2015 . Source: Freddy Was Wrong
Powered GM ‘Murica WIP
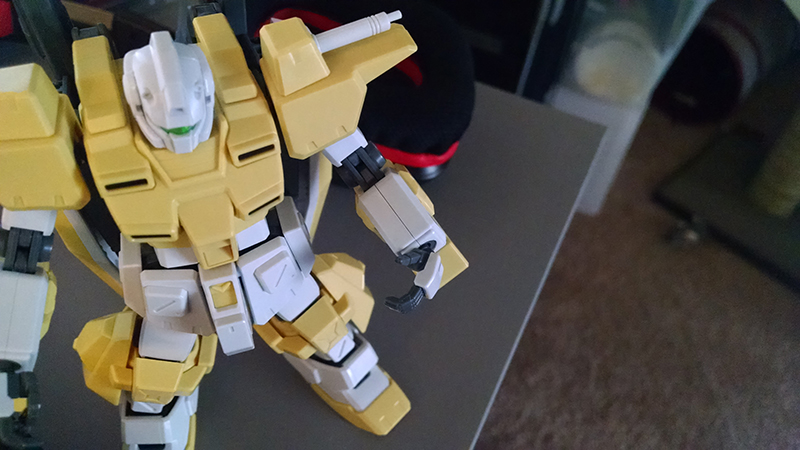
Powered GM ‘Murica WIP Potential color scheme inspired by the Megebots Mk. II. Going to end up adding a lot of guns to this so yeah… ‘MURICA! Used a pin vice to bore holes into the beam sabers and convert them into guns. Didn’t get the holes perfectly centered. Since this is based on an old kit, its using old joints which have to modified in order to be able able to remove the seam lines. This way I can paint the joints separately. Dont have to worry about seam lines for the thighs since there’s already a molded seam line. Cut off the pegs for the leg joints. Removed a peg from the inside of the forearm and trimmed the joint to be able to slide it in. The forearm machine gun assembly has a peg … Read More
Download my MASSIVE How To Build Gunpla Guide!
Download my MASSIVE How To Build Gunpla Guide! Six months in the making. One hundred and thirty five pages of tools, supplies, tips, suggestions, and techniques. It’ll take you from clipping pieces off sprues, through surface preparation and painting to decal application and washes and there’s even a section on photographing your completed model. Click on the picture below to get to the download page. Source: Funakatown
Bandai 1/100 VF-25S Messiah Valkyrie Complete!
Bandai 1/100 VF-25S Messiah Valkyrie Complete! After completing the Core Fighter I repaired the Wing Gundam shadow box project that had been pretty well wrecked in an earthquake we had a few months back. After that I dusted off a project that had been on hold for about 18 months. I had it all ready to paint but when it came time to give it a white shaded paint job, I lost interest. So I grabbed another one of the 6 decal sets I had created for this neat little kit and made Ozma Lee’s gray VF-25S. To see the gallery, follow the picture link below: To see the short Work In Progress report, follow the picture link below: Source: Funakatown